In this tutorial, using 3dsmax, we will make a Clear (Transparent) Glass material and apply to some objects.
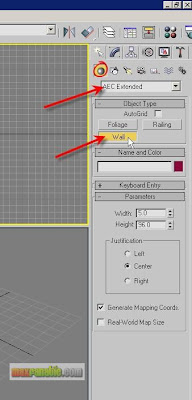
Start or Reset 3dsMax. If there is no minimum environment or surrounding objects around the glassy objects it will not make much sense for glass material. That means, the effects of glass material’s reflection/refraction etc. will be seen only there are some objects/environment around. So, we will make a simple room for our glass objects to be placed into. Choose Create > Geometry >AEC Extended > Wall.
Please note that “AEC Extended” is not available in 3dsmax’s previous versions (such as V5 etc.). I have used 3dsmax8 for this tutorial. However, you can make walls or room using other max object such as Box promitive.
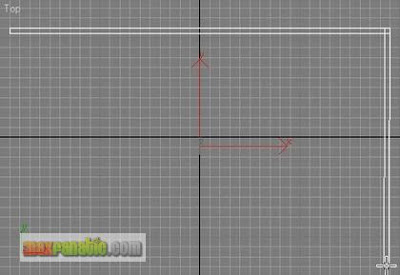
In the Top viewport, create a Wall like below.
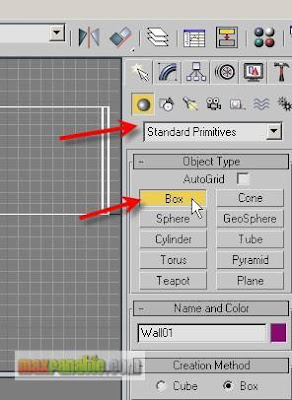
For making floor, choose Create > Geometry > Standard Primitives > Box.
In the Top viewport, draw a box like below. The floor should have been placed at the ground zero level without any problem.
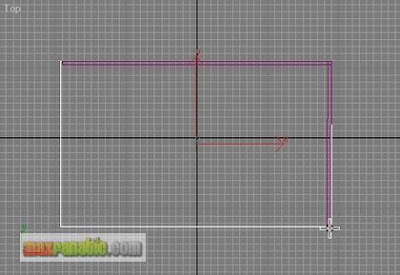
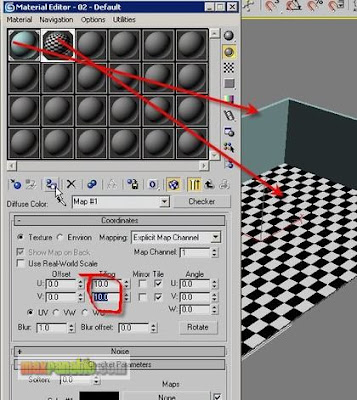
Apply a simple colour material to the wall and a Checker material to the floor. Adjust the number of Tiling of Checker as your wish.
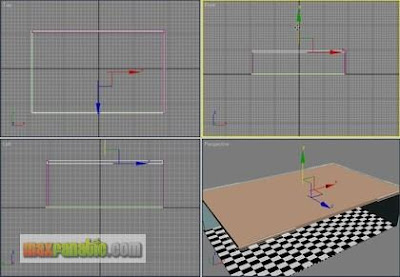
For ceiling, create another Box in the Top viewport. Then move it up in the Front viewport to place it in the proper height. Apply a white colour material to it.
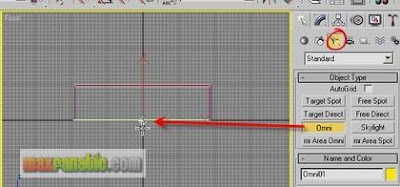
Create an “Omni” light as below.
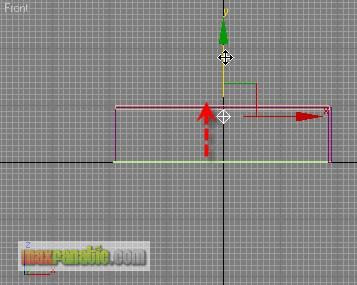
Then move up the light just below the ceiling so that it can illuminate the room.
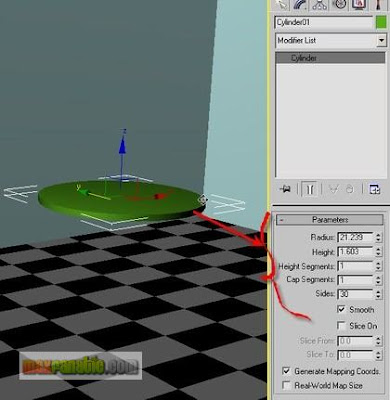
We will assign the Glass material to a glass, a bottle and a small tea table. For the table-top, make a cylinder with the parameters like below.
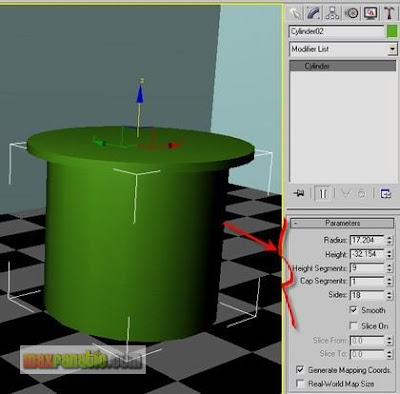
For the table-leg, clone this Cylinder and adjust its parameters like below.
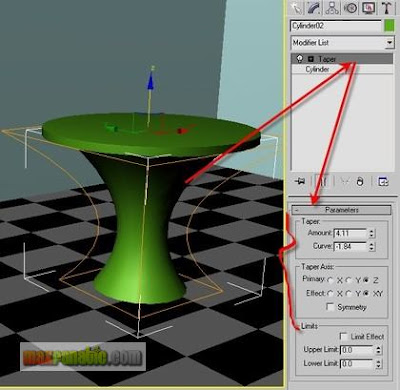
Add a “Taper” modifier to Cylinder02 and adjust its Amount and Curve value so that it gets a nice curvy shape to represent the leg of our glass-made tea-table.
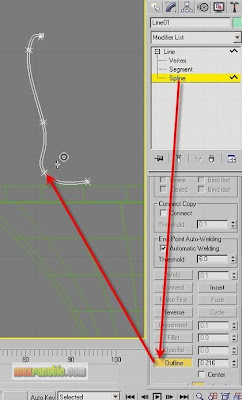
For Glass Mug, Choose Create > Shapes (Splines) > Line and draw a line to get the basic profile for the Glass Mug. Go to Modifier panel and enter its Spline sub-object. Using “Outline” command, make an offset of the line in the viewport by dragging the mouse pointer to a little right. See below.
Apply a “Lathe” modifier to it and choose “Max” in the Align group.
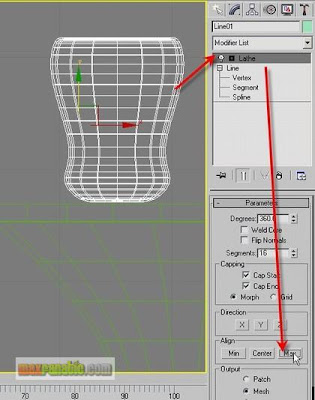
Move it to the proper place on the table-top.
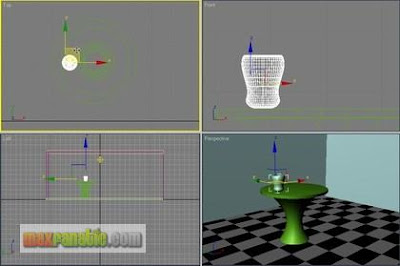
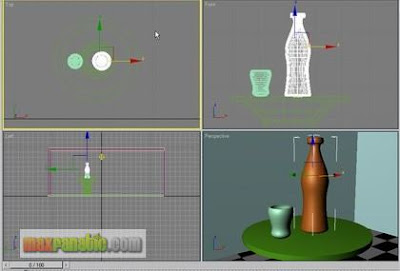
Again using Lathe technique or your preferred modeling technique, make a Bottle and place it beside the Mug.
Open the Material Editor and choose an unused sample slot. Name it “Glass” (although it is not necessary to name a material it is useful in the big project’s files where there are many materials to be assigned to several objects for better recognition). Click the button lebeled “Standard”. We will change the base material type from Standard to Raytrace.
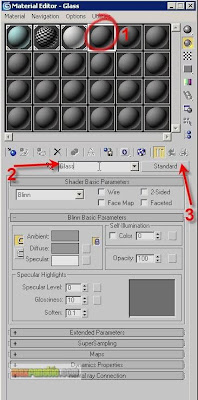
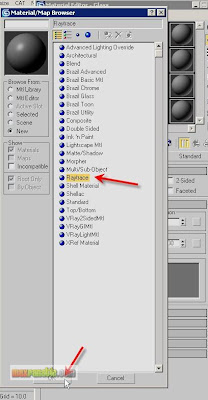
In the Material/Map Browser, choose Raytrace and then click OK.
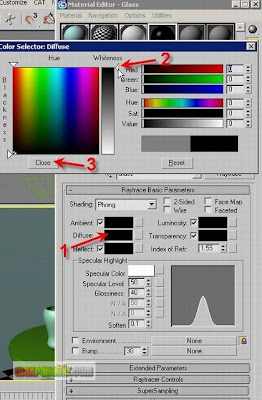
Click the Diffuse colour swatch under Raytrace Basic Parameters and then choose a solid Black colour. Close the colour selector option box. A black diffuse colour means here that a glass will have not its own colour.
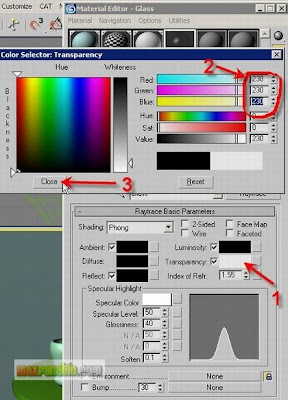
Then, choose a near white colour of RGB value of 230, 230, 230 as the Transparency colour. Assigning a near-whitish colour (bright grey) means that it is almost a 100% transparent material.
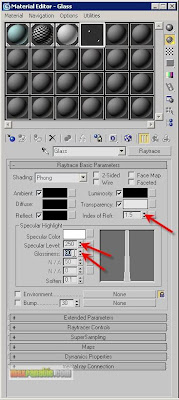
Set the Index of Refraction value = 1.5, Specular Level = 250 and Glossiness = 80. In the real world, the IOR of a Glass material is 1.5. Also, the specified Specular Level and Glossiness is reasonable to those of real world glasses while the Specular Colour of Raytrace material is set to White by default in 3dsmax.
In case of glasses, there is also Reflection beside Refraction. We will now assign a Reflection type to the material. Click the Map button next to “Reflect”. Then choose “Falloff” in the Material/Map Browser and click OK.
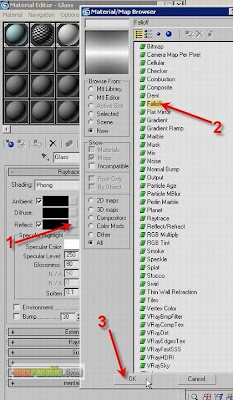
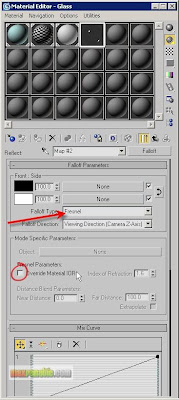
“Falloff” is a special type of mapping technique which defines the area of an object into two parts and distributes the map accordingly. Choose the Falloff Type = Fresnel. A “Fresnel” falloff distributes the map with the logic of Front and Side. In this material, the Reflection will be assigned most to the Side and least to the Front of the object. Because the Black reflect colour is assigned to Front and the White reflect colour is assigned to Side. Turn OFF “Override Material IOR”.
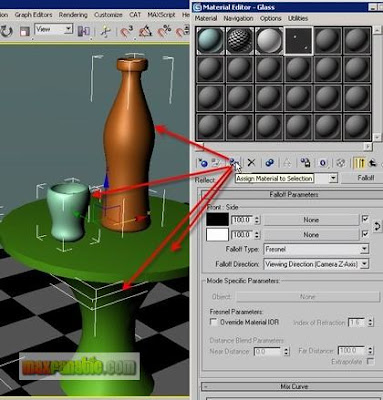
Select the Mug, the Bottle, the Table-top and the Table-leg and assign this glass material to these objects. Render.
Play with the parameters of the glass material and see the result. For example, you could make another Raytrace material for the table where you can set the Diffuse colour different such as blue etc. Also, play with the Falloff Type. You will see different results on different settings.


No comments:
Post a Comment